Trailing 14 months isn't where it ends! Learn how you can dive into additional date ranges inside of Market Insights before you add a lead to your pipeline!
What's in this article?
1. Selecting a Date Range on an Originator or Agent Profile
2. Applying a Custom Date Range
How does this help?
In order to make effective decisions, it is crucial to have the capability to thoroughly explore past data and information. That's why you're able to select from a wide-range of Date Range options when viewing an Originator or Agent inside of Market Insights BEFORE you add them to a Pipeline (Requisition).
Selecting a Date Range on an individual's profile
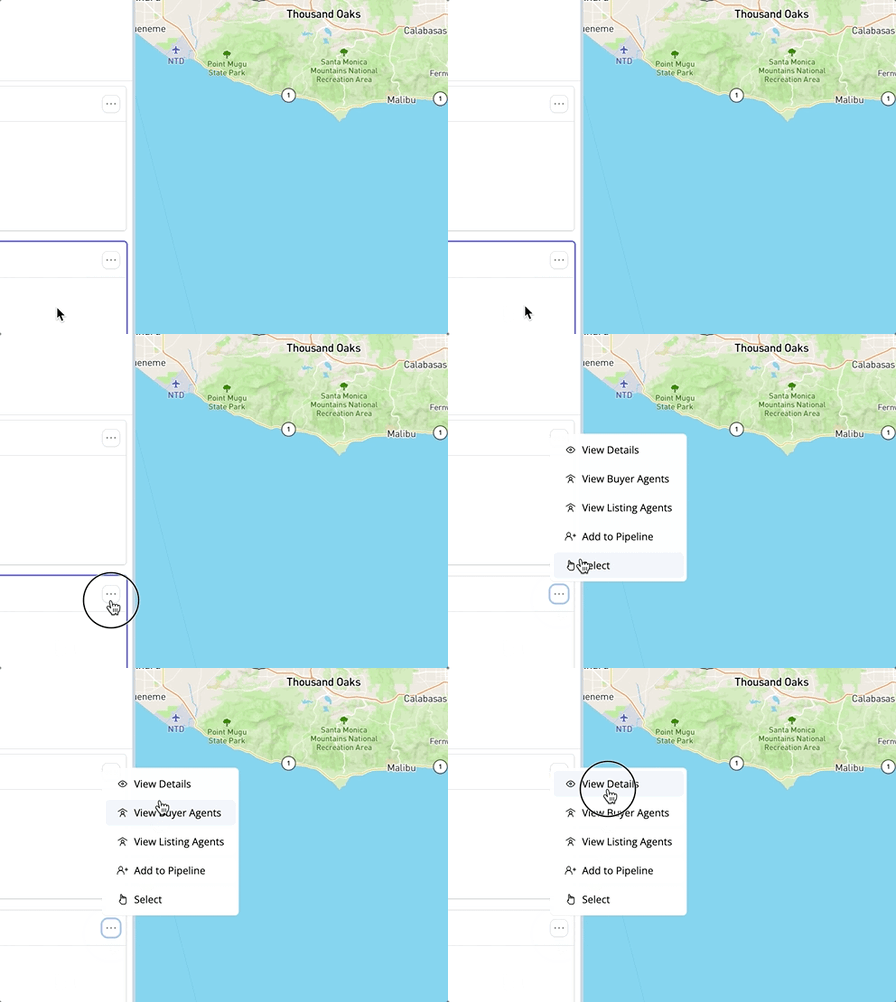
1. Let's first open an Originator or Agent profile inside of Market Insights by clicking the options menu and selecting "View Details".

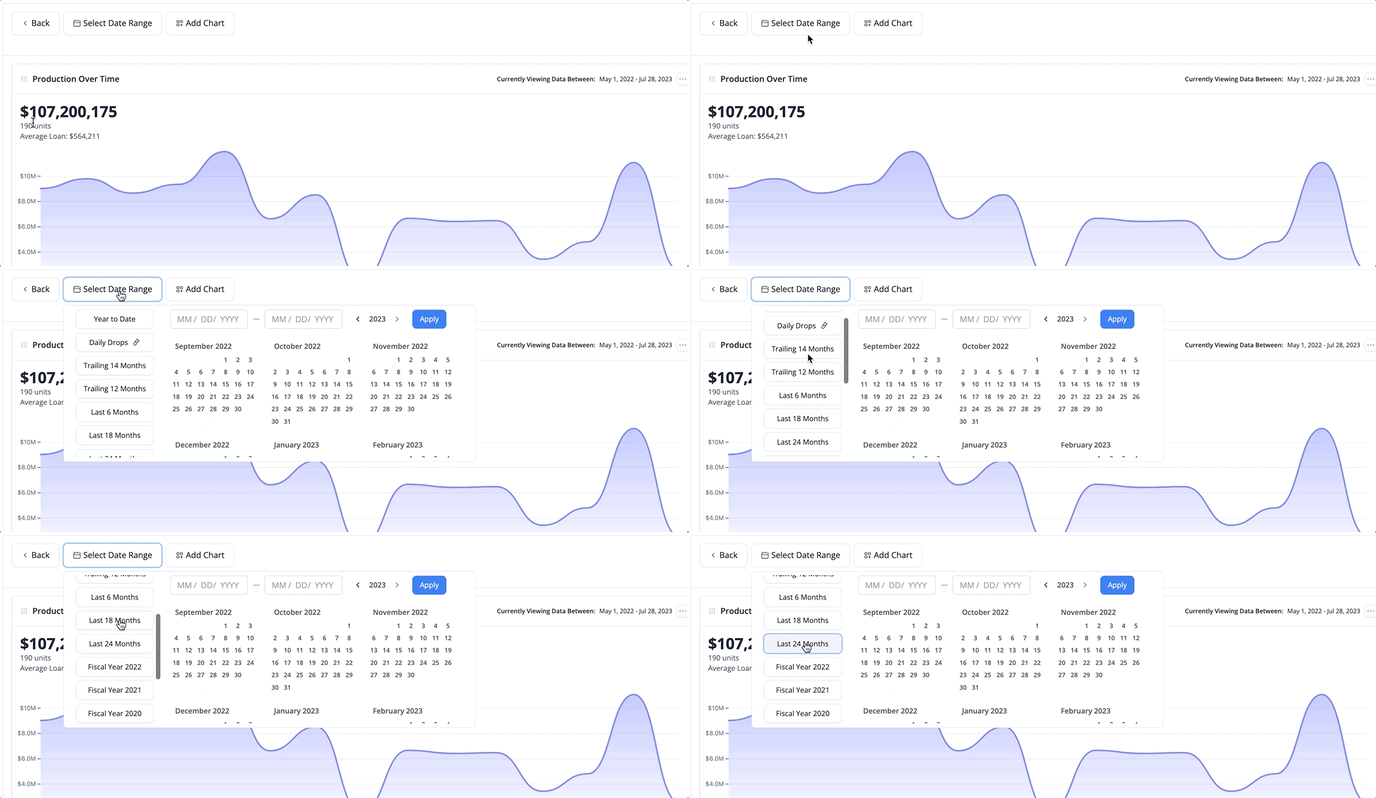
2. Once you are viewing a profile, simply click on "Select Date Range" at the top of the profile to choose a date range.

🧠 Did you know? Model Match will remember the date range you selected throughout your entire session. This means that when you are moving between lead profiles, you won't have to manually change the Date Range each time. You can easily see the date range you have selected by looking at the "Currently Viewing Date Between" on the Production Over Time chart.
Using Custom Date Ranges on an individual's profile
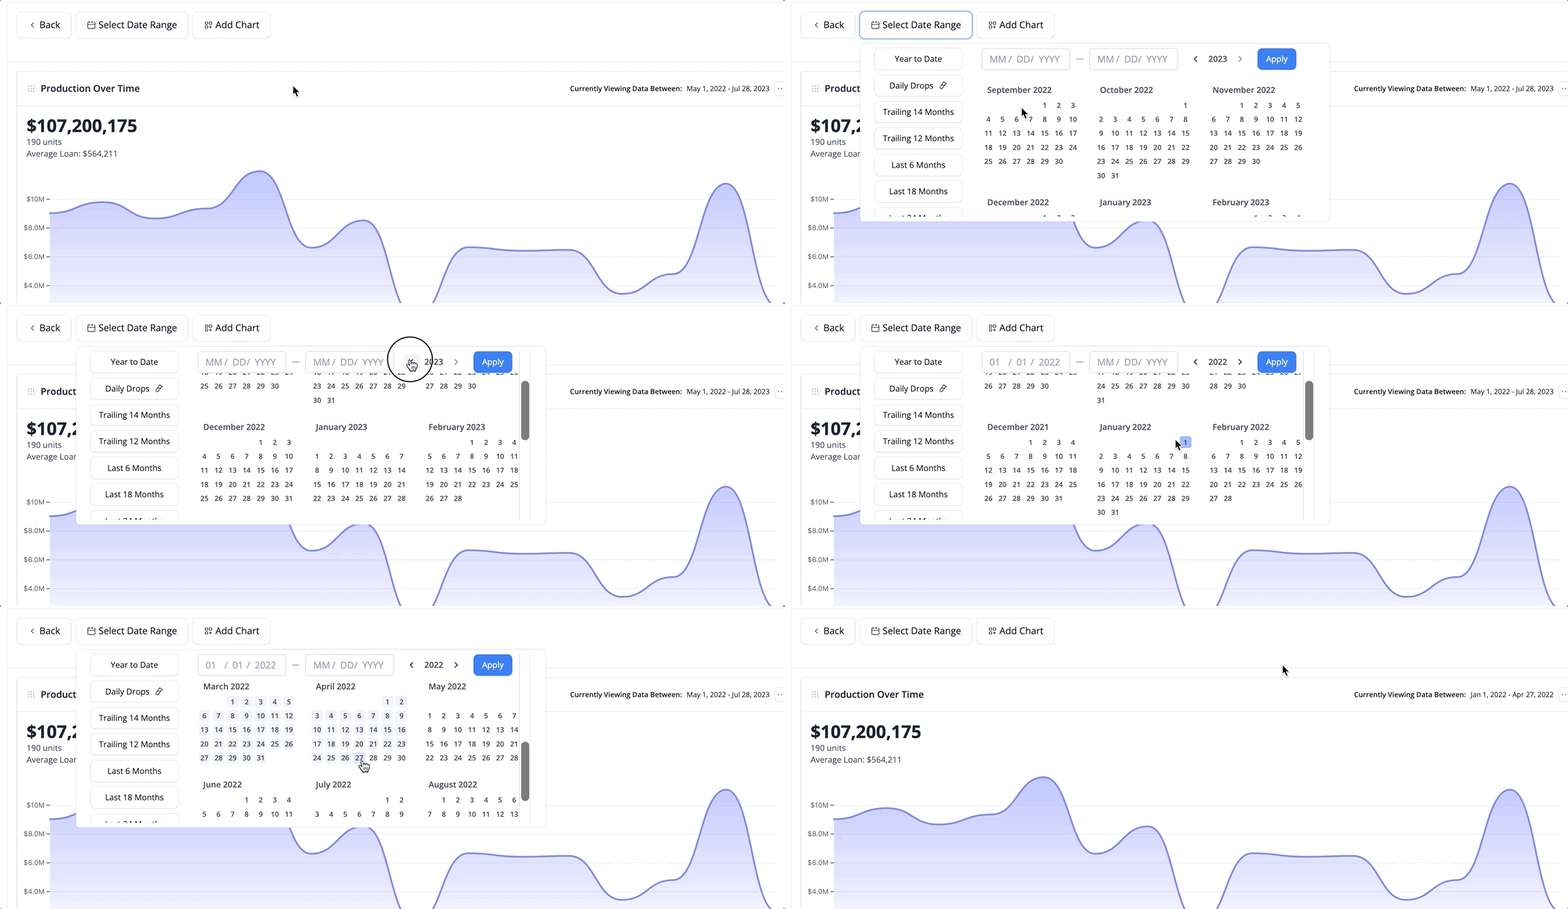
1. To apply a custom date range to a volume report, you can select the year, month, and start date and end date using the calendar like so:

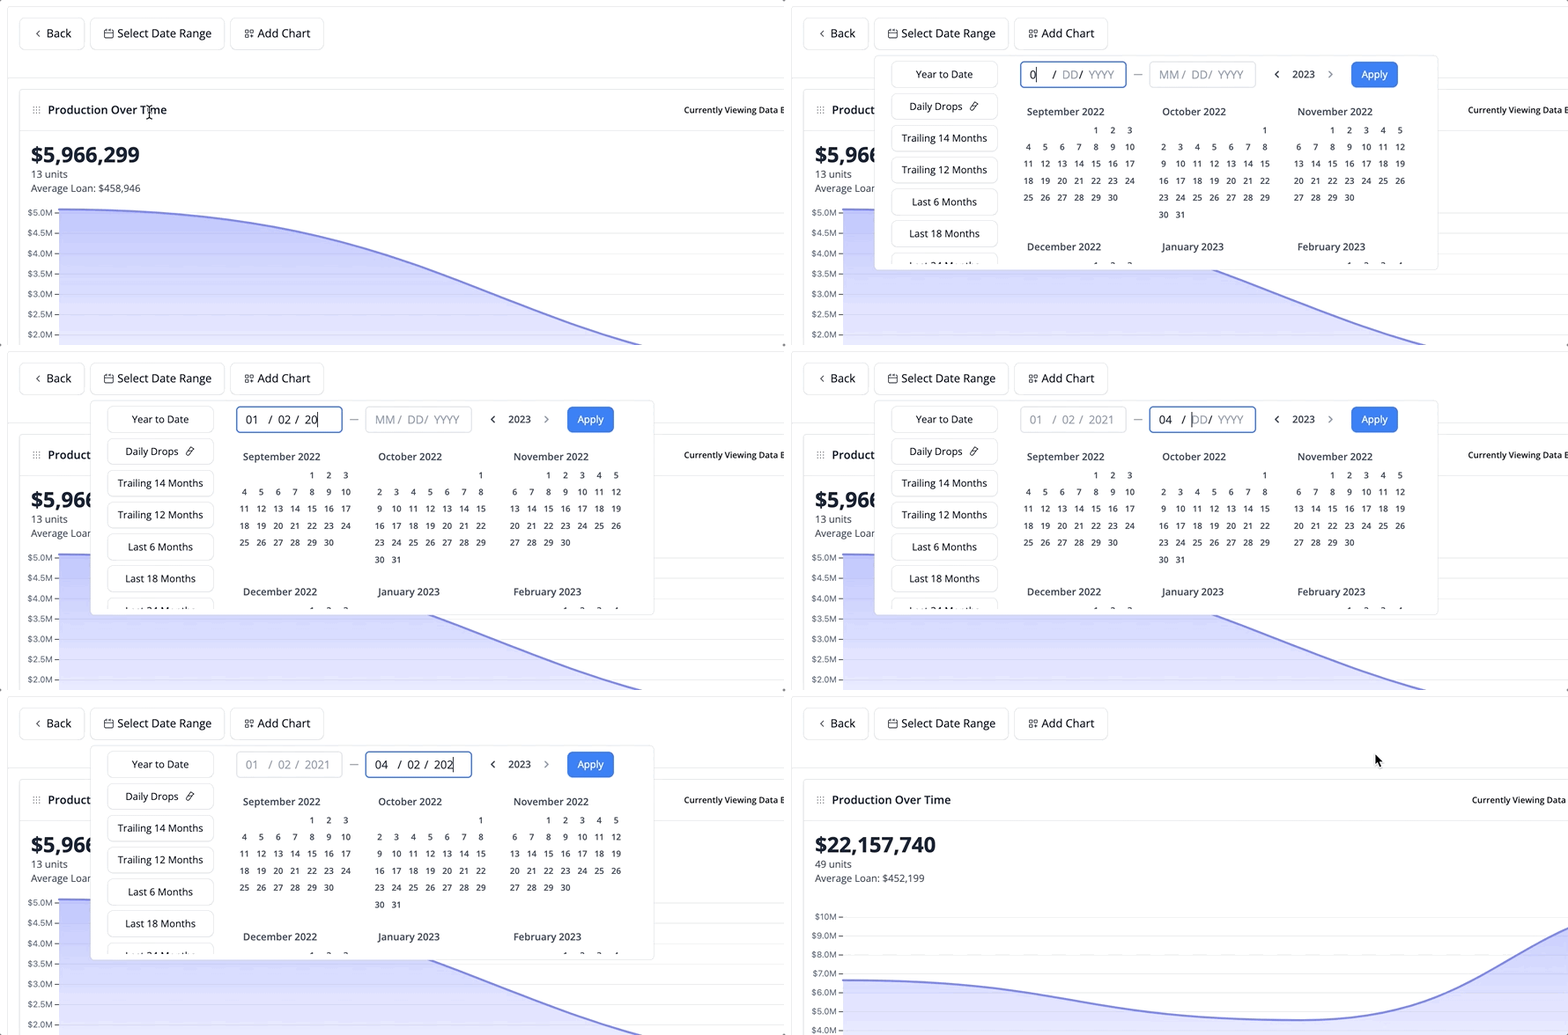
2. Alternatively, you may use the date fields following the format provided to set a Start and End Date like so:
