How do I create Custom Fields?
This article will walk you through creating and filtering Custom Fields on your account
What's in this article?
2. Text Fields 💬
3. List Fields ✅
4. Using Custom Fields 👩💻
👋 Currently, only Admins can create Custom Fields. If you are not an Admin you will want to contact your account Admin for assistance.
Creating Custom Fields
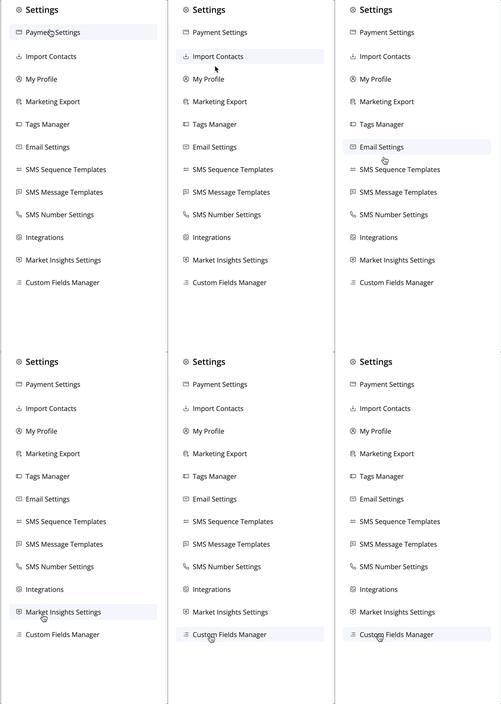
First, navigate to your Settings page. To do this select the settings gear on your left menu panel. Once selected your Settings will populate on your screen with different options for you to choose from. From here select "Custom Fields Manager".
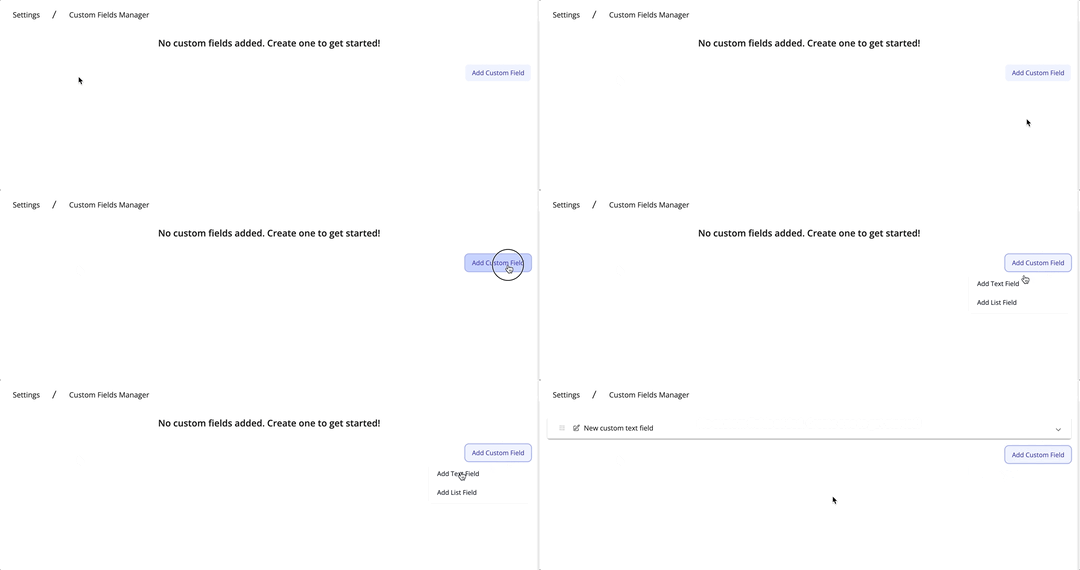
After "Custom Fields Manager" has been selected the page will populate on the right side of your screen. You will be able to begin creating custom fields by selecting the "Add Custom Field" button on the right. Once chosen you will have two options to choose from when it comes to Custom Fields.
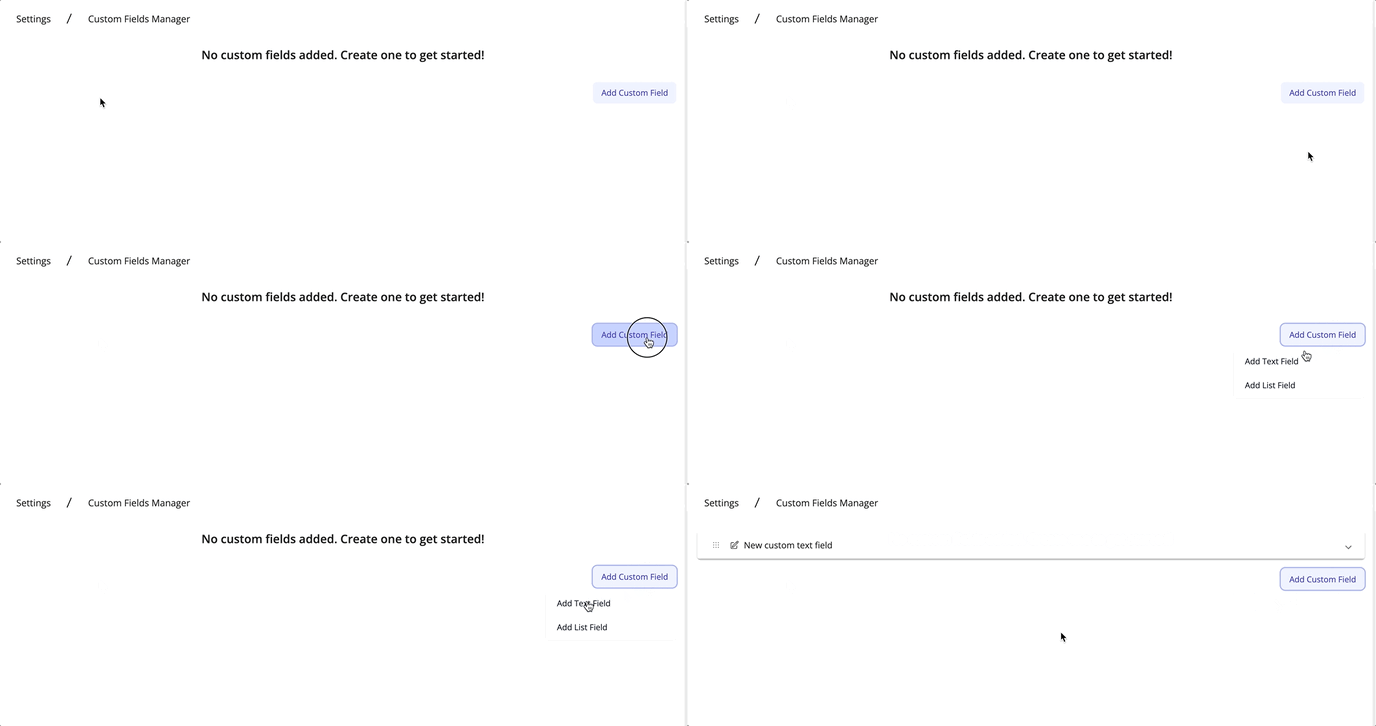
Creating a Text Field
The first option is adding a Text Field. Under the field name simply provide a title for your custom field. Adding a text field gives you and your team the flexibility to provide detailed information about specific contacts.
1. First, let's click "Add Custom Field" and select "Add Text Field" from the dropdown.
2. Now, we need to give our new Text field a name. To edit our text field and label it properly, let's click the field in our list and provide it a name.
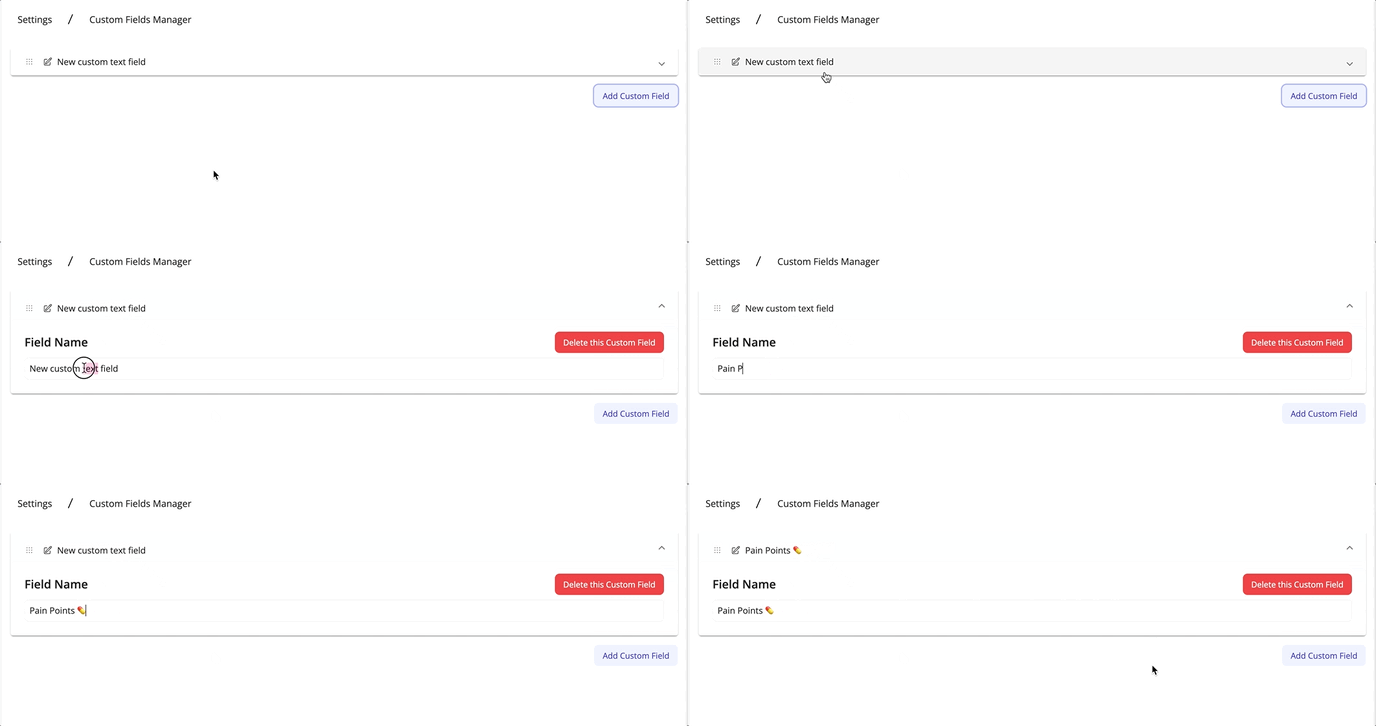
💡 You will notice you aren't able to locate a Save button! That's because your changes are automatically saved!
Creating a List Field
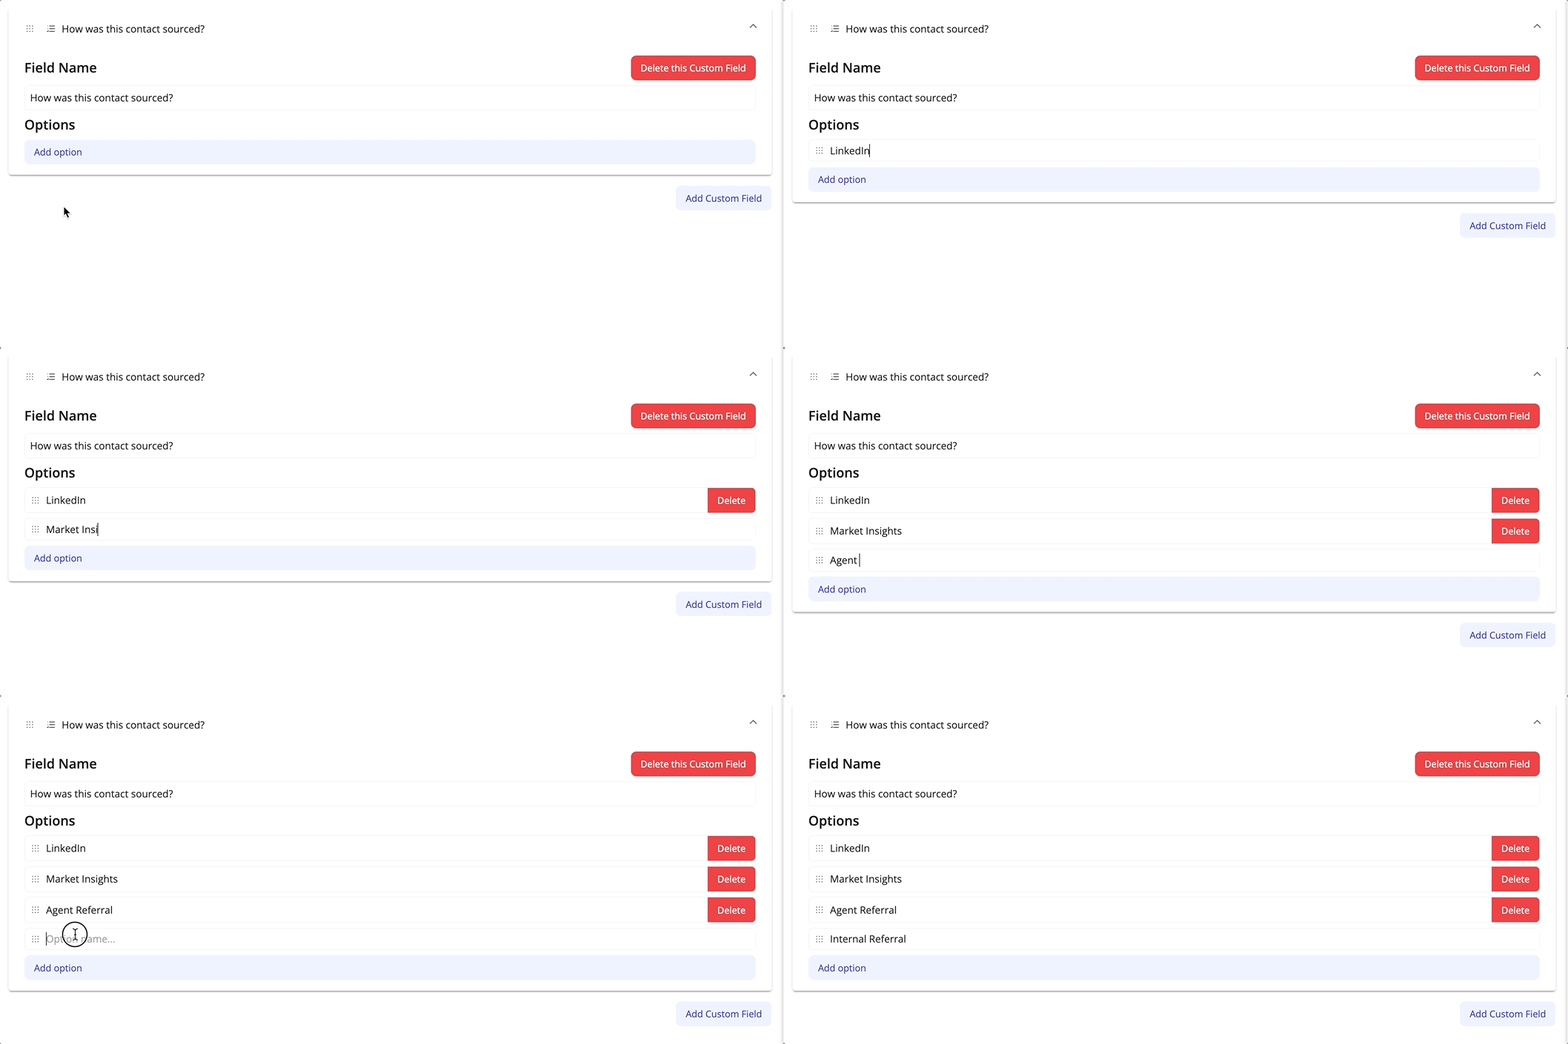
Now, let's take a look at creating a List Field. List fields allow you to provide multiple options within your field. You can add as many options as needed. Currently, only single options can be selected from a List Field.
1. Let's click "Add Custom Field" and select "Add List Field" from the dropdown.
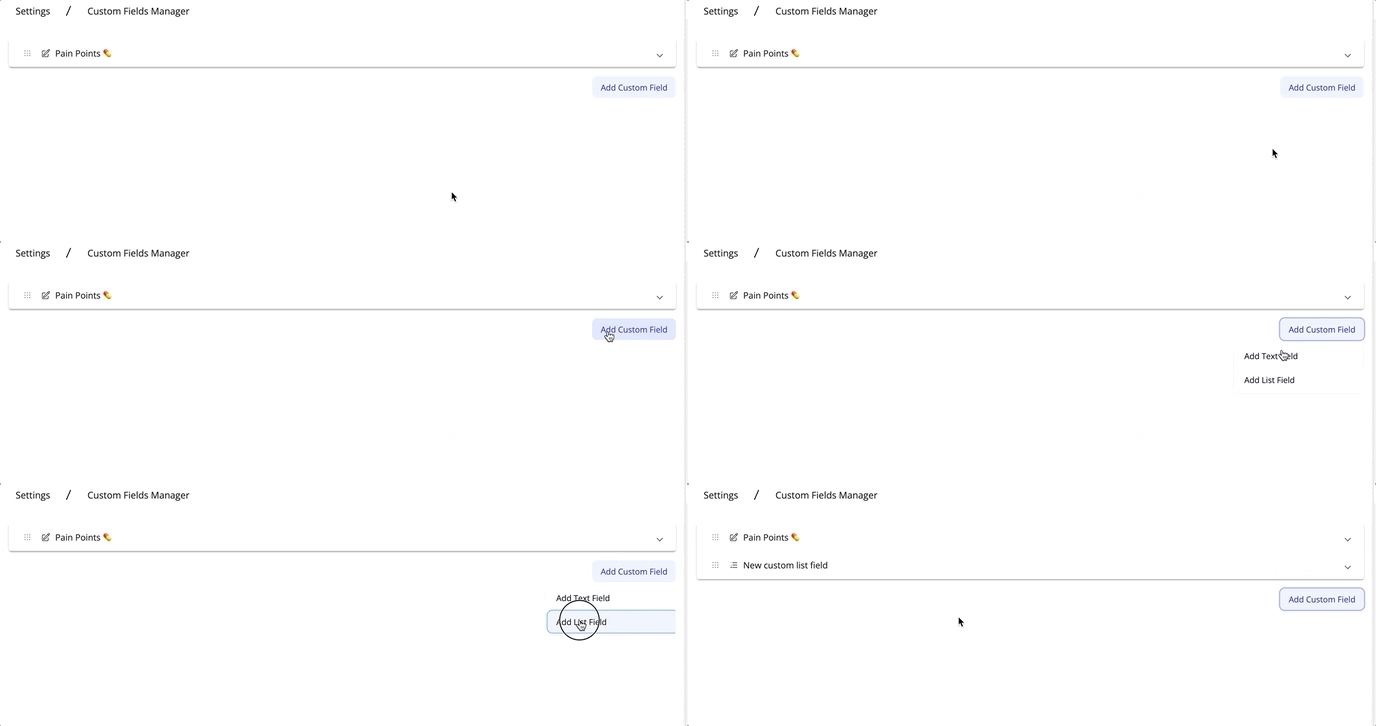
2. Now we can edit our new List field, provide it a name and build out the options our team can select from. Let's click our new List Field
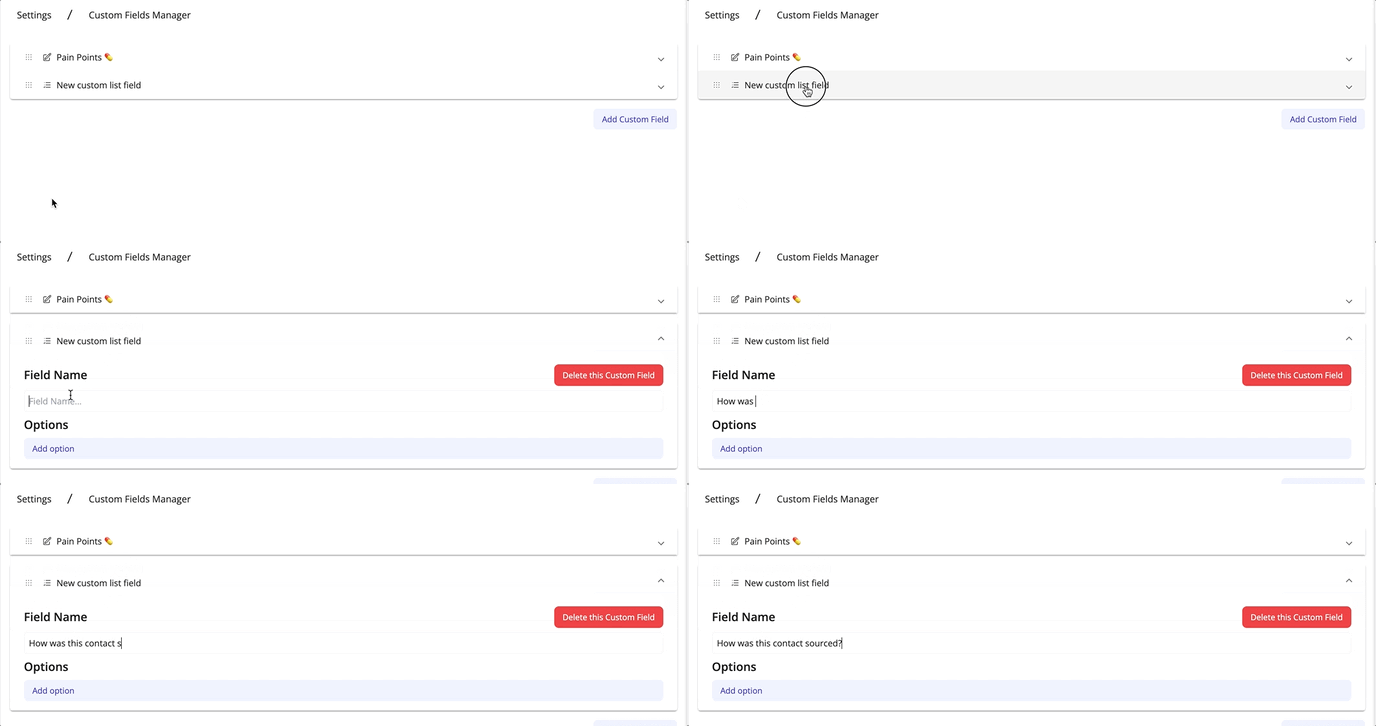
3. Since we creating a List Field, we need to start adding Options. Let's click the "Add Option" button to see how we can do that.
Using Custom Fields
After your custom fields have been created there are several different ways that they can be viewed and applied. They can be viewed inside all Pipelines that you have direct access to and are available to all team members on your account. Additionally, you can filter contacts in contact tables using these fields.
1. Using Custom Fields on Contact Profiles
2. Filtering contacts on Contact Tables using Custom Fields
Contact Profiles
Let's take a look at how we can view and apply data to our fields on Contact Profiles.
1. Let's open a contact record and click on the "Custom Fields" on the profile

2. Click on the field you're looking to add data to. List Fields will show a dropdown with your options and Text Fields will allow you to start typing.
💡 You will notice you aren't able to locate a Save button! That's because your changes are automatically saved!
Filtering Custom Fields on Contact Tables
It's super easy to filter contacts using Custom Fields from any contact table on your account. In this example, we are going to filter all contacts in the Candidates stage using one of our Custom Fields.
1. We will click on the "Candidates" stage from our Dashboard. If you're following along in your account, you can open any contact table, whether from the Dashboard or within a specific Pipeline.
Once on the contact table, let's pull in the Custom Field we are filtering. This isn't required but it would be helpful to see the data coming back into our table.
💡 Pro-Tip! Custom Fields are located at the bottom of your Columns List.
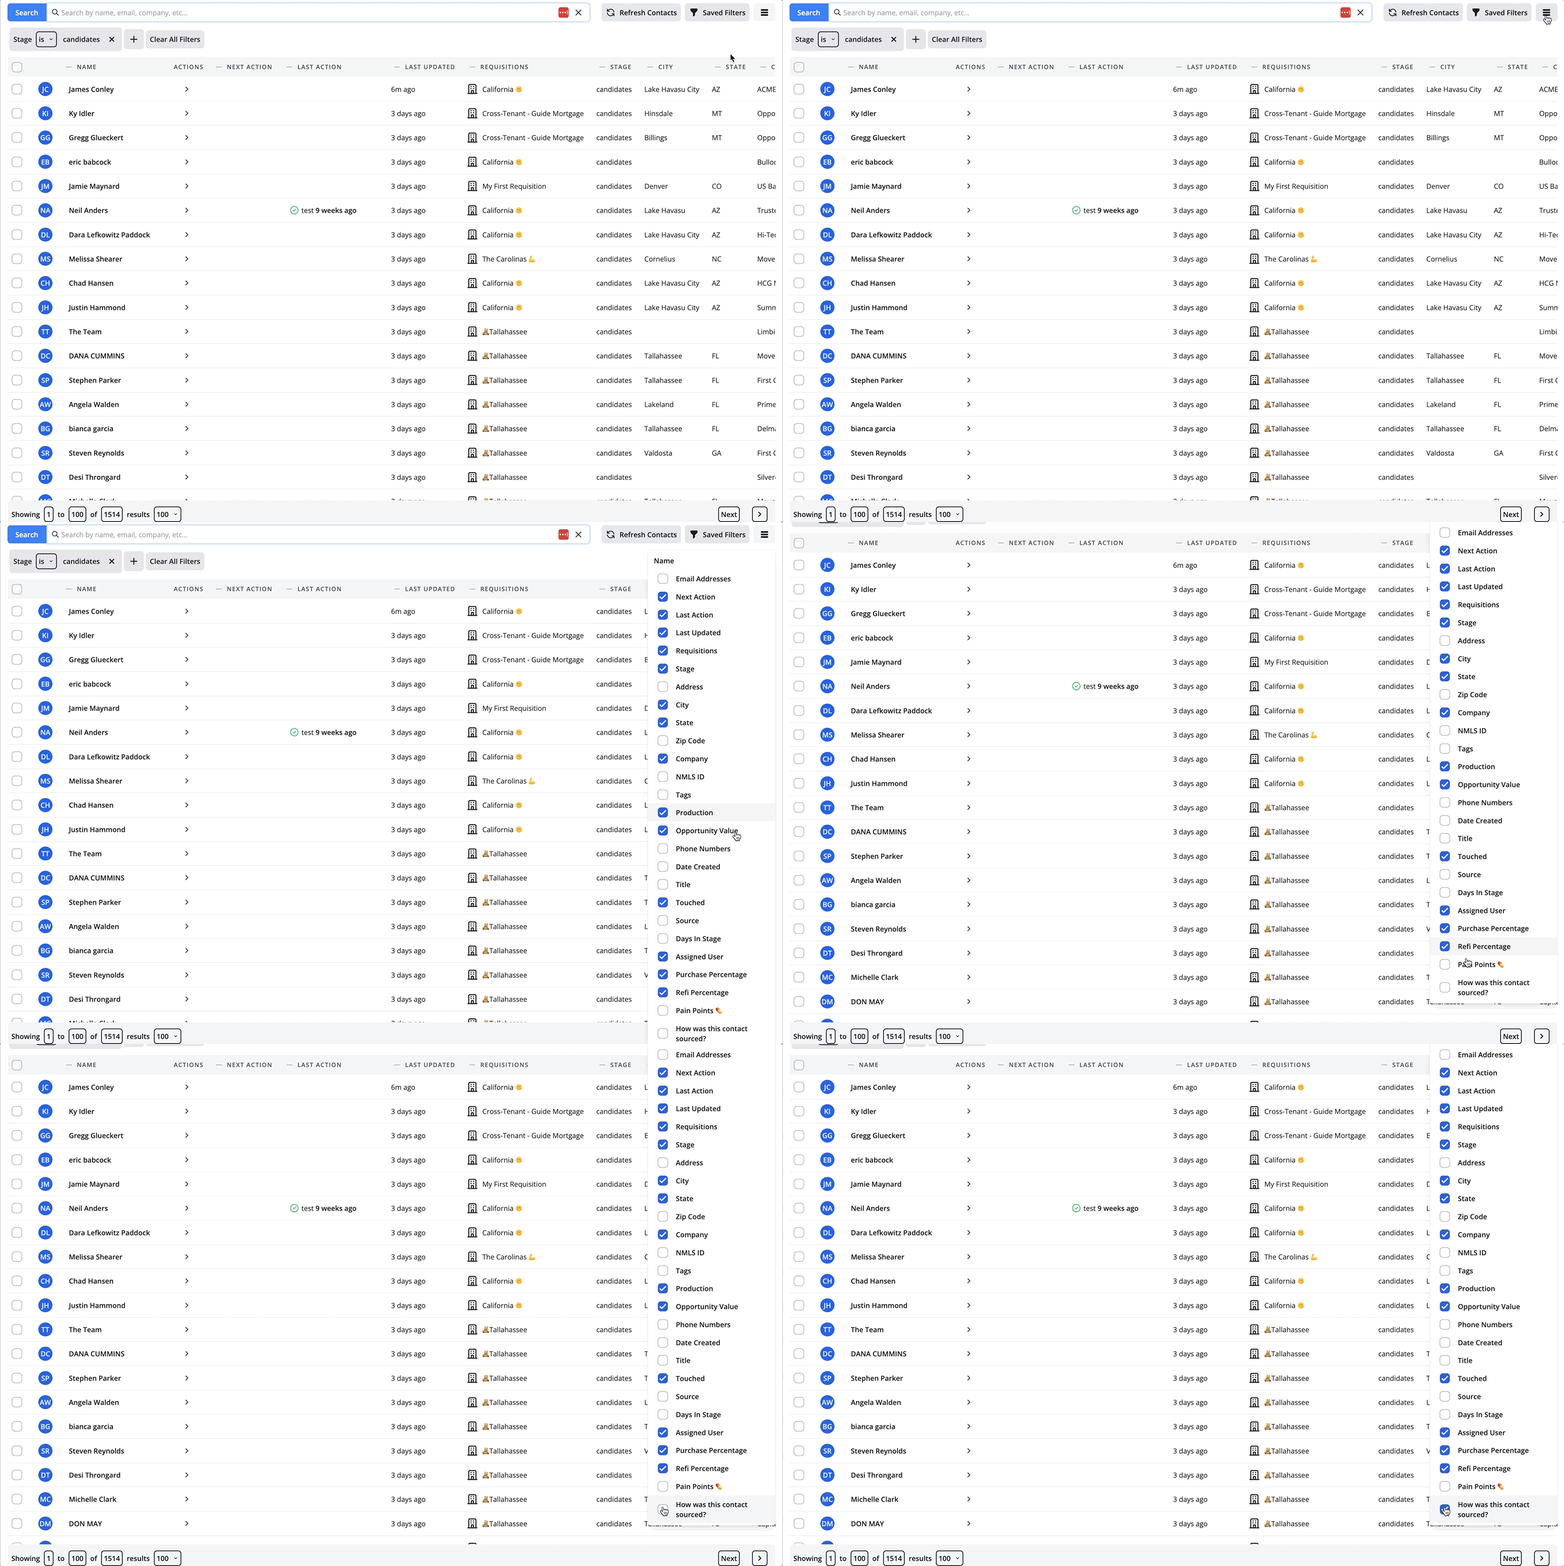
2. Now that we have our Custom Field showing on our Contact Table, let's click the Filters option and filter by data in that field. Select "Custom Fields" at the bottom of your filters list.
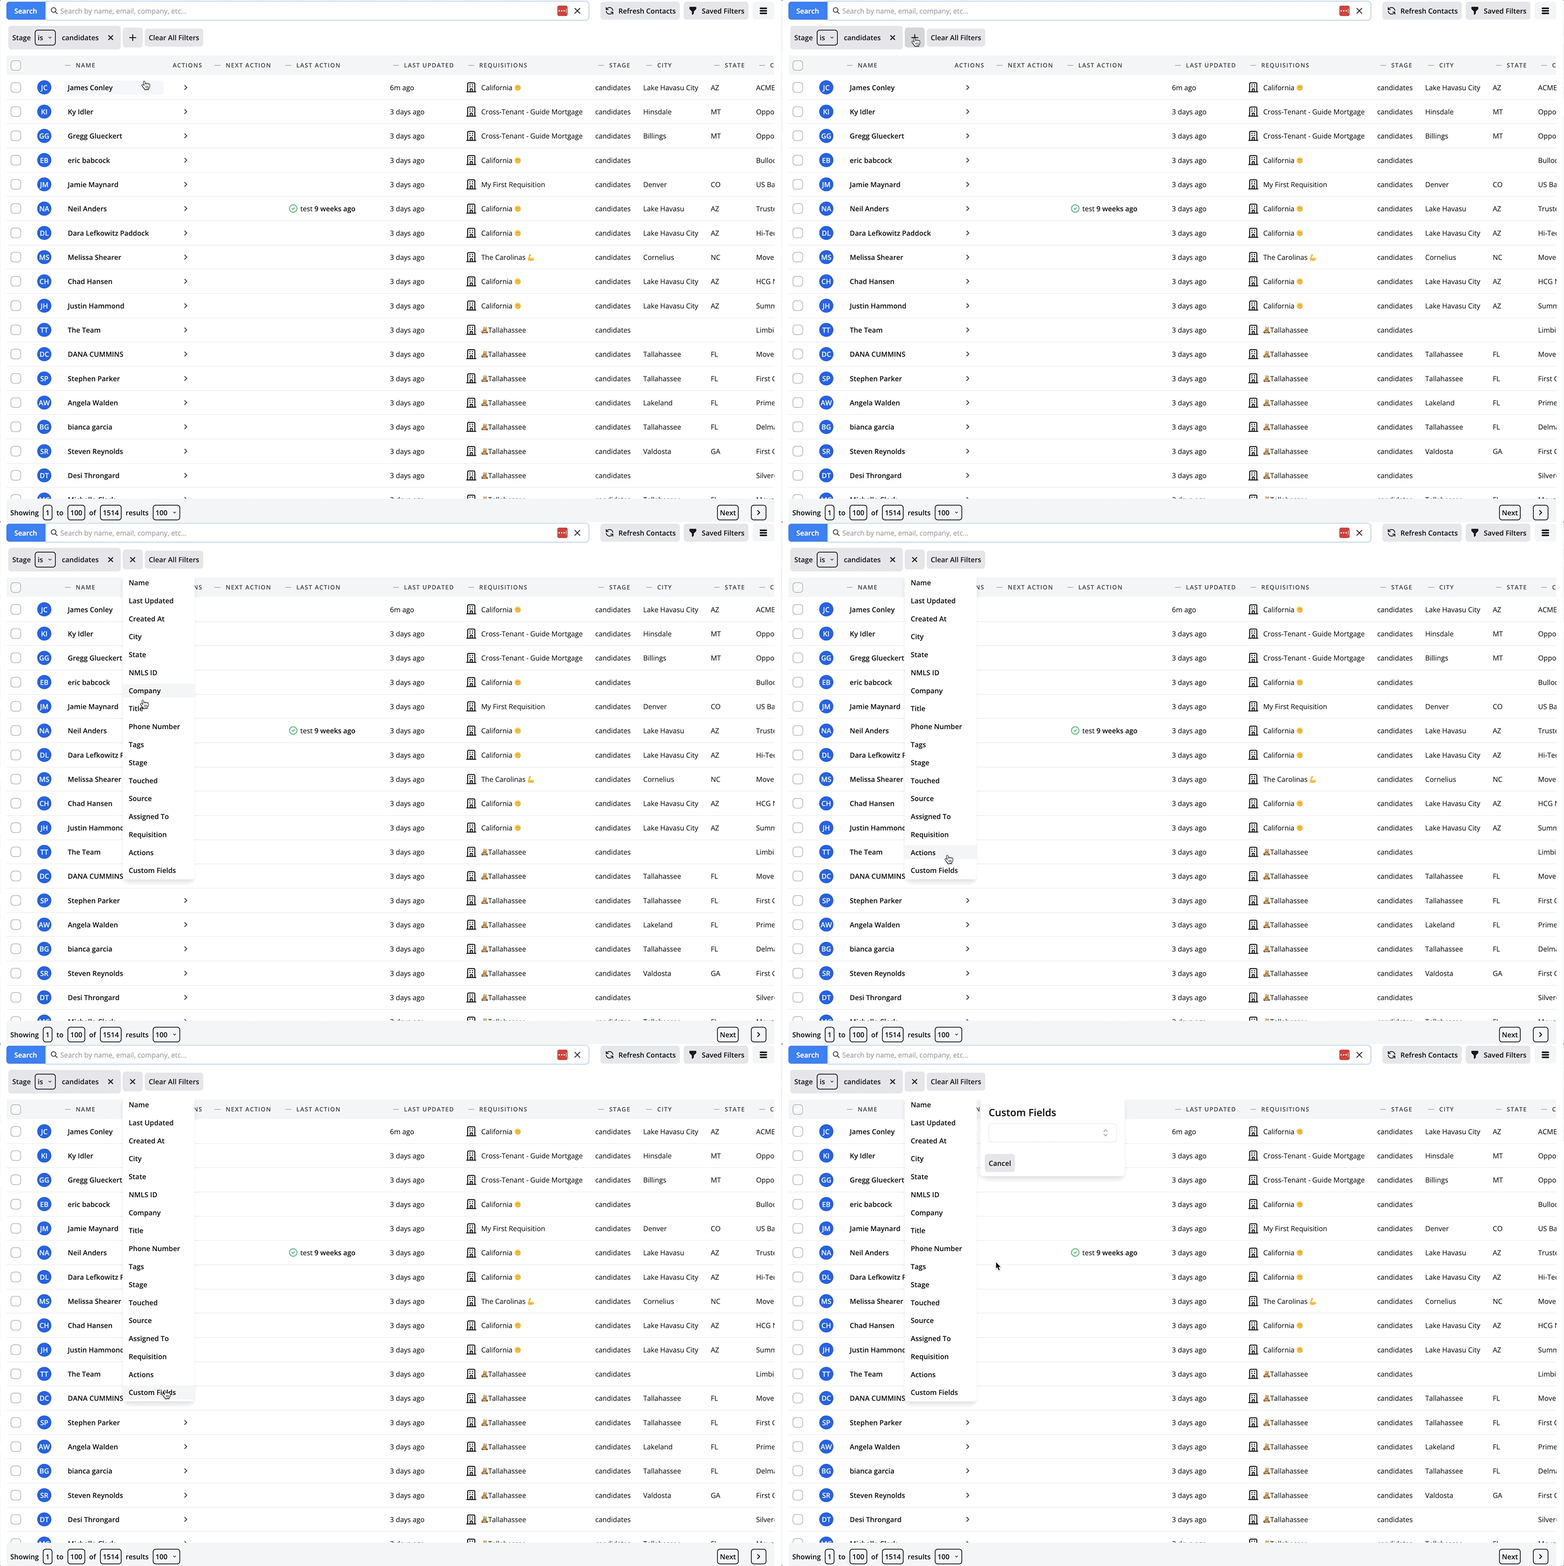
3. Now let's select the dropdown and select the Field we are looking to filter.

4. Click Apply and you're all set!
💡You can always filter contacts using Text Fields! You can include any keyword or exact phrases within a string of text to filter contacts.
