Our import tool helps you import contacts to your Model Match account. You are able to upload contacts via a .csv file or copy and paste from a spreadsheet like Excel or Google Sheets, or by typing in data directly into the import table.
What's in this article?
3. Tag contacts when importing
Resources
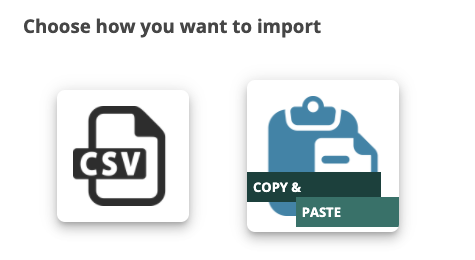
Copy & Paste Method (Recommended)
This method allows you to simply copy your data from an external source like a spreadsheet and import the data into Model Match. This is the recommended method as it provides a bit more control and a more visual experience.
How To
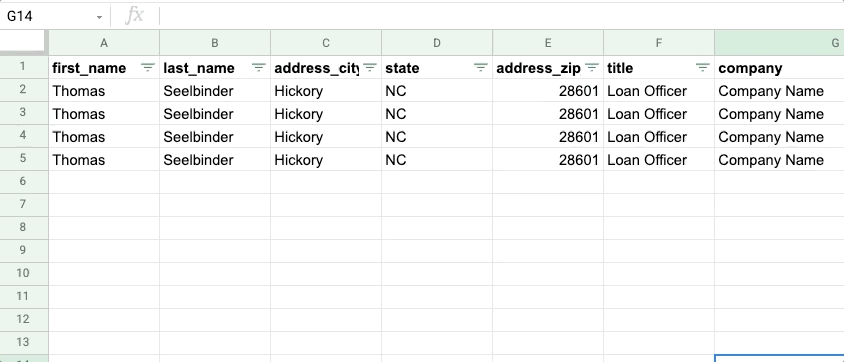
1. View the Import Template and review the available headers. These headers align with contact fields that you are able to create and populate with your data.
2. Format your data in a way that allows you to break up each column. For instance, only first names should be populated into the "first_name" column and only last names should be populated into the "last_name" column. It's highly recommended you double and triple check that rows are properly aligned with your original source.

3. Once your data has been moved over into the proper columns, copy all of the rows populated with data.
4. Navigate to Model Match and click the "Settings" icon on the menu.
5. Click "Import Contacts" from the list of available options.
6. Select the "Copy and Paste" option.
7. You'll have a few options here that we want to highlight.
- Company Contacts or Personal Contacts
- Company Contacts are contacts that are added to the account and shared with all users on the account.
- If you're importing contacts to a Requisition (next option), you will be required to select Company Contacts. However, Contacts added to a Pipeline on import are ONLY shared with users who also have access to that requisition.
- Tenant
- This is your account name
- Requisition
- Select the Pipeline you'd like to assign contacts to after they are created
- Tags
- You can also Tag contacts on import as well. This helps for greater organization.
Now that you've made your selections, let's copy and paste our data.
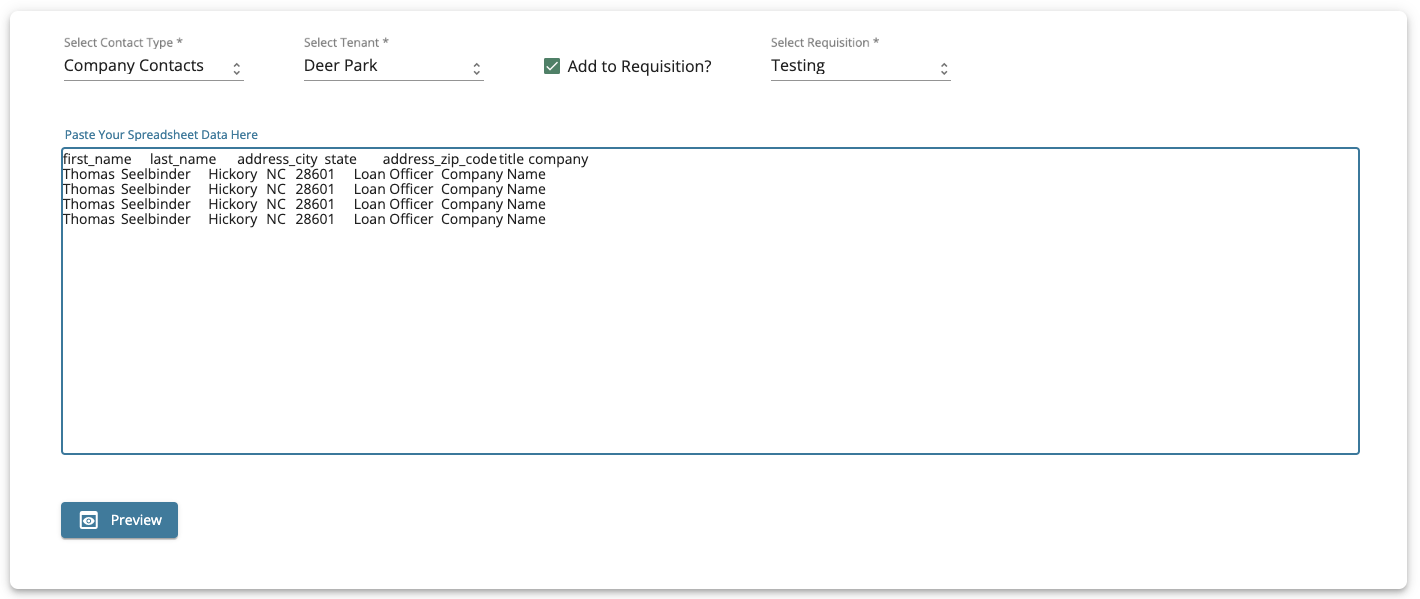
You won't need to worry much about the format here. Let's click "Preview" to move forward.
The next screen will display the top 3 rows in your data and allow you to make any final changes. Be sure to double-check to ensure rows are still aligned and data is still matched with the proper contacts that you will be creating. Clicking the Header Name will allow you to make any changes that are necessary.
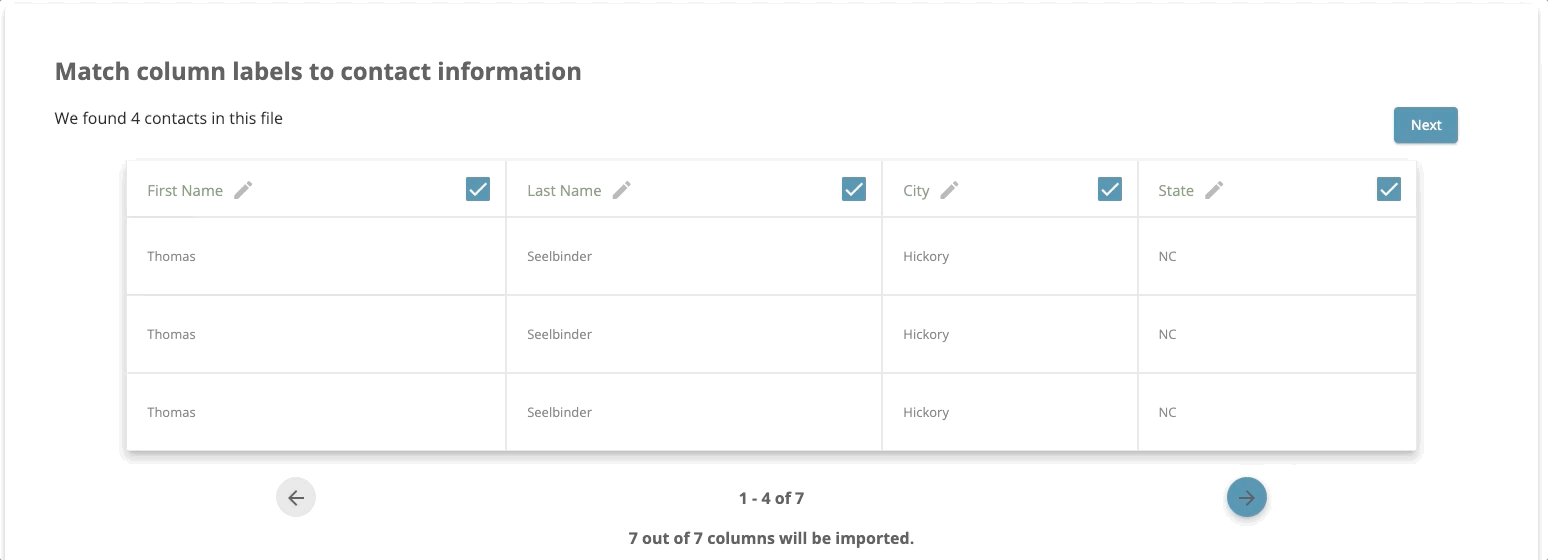
Once you're confident in your data, let's click the "Next" button.
We can now Tag and Assign our contacts if appropriate.
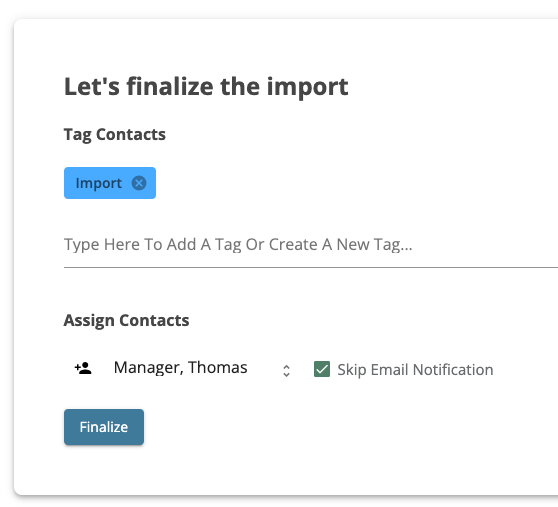
Let's click "Finalize" to review a Final Confirmation.
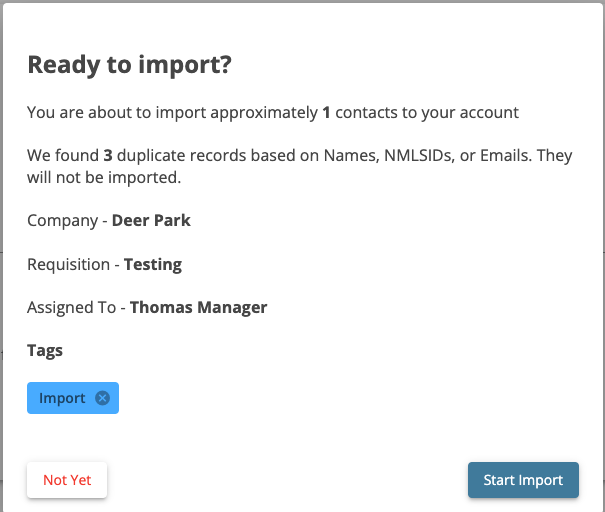
We will display how many contacts will be imported to the account and highlight the number of contacts we determined to be duplicate contacts. We will also display the Tenant (your account), Requisition, Assigned To user, and any Tags you've chosen to add to these new contacts.
If all looks correct, click "Start Import"
Notes will be added to the top-level contact record. If viewing the imported contact inside of a Requisition we recommend using the "Viewing All Activity" option under the Requisition column on the History table to view your notes.
Importing Custom Fields