How do I Save a List of Contacts Using Filters?
Creating a hot-list? You can quickly save lists of contacts using filters so you can quickly access contacts that are commonly viewed.
Beyond adding additional columns to contact tables, you can also save them. This helps cut downtime on having to re-filter a list to view information that is most important to you. Let's say you're consistently viewing contacts that are at a specific company or are focused on a specific city and state - having to add those filters each time can be a pain and slow you down.
Let's look at how we can save those lists.
Adding Filters and Saving a List
First, we will want to start adding filters to our contact table. This can be done inside of a Pipeline or the main contact list. Below, we will show you how to do so within a Pipeline.
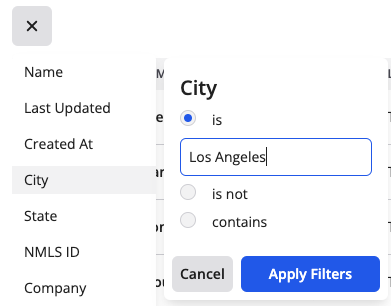
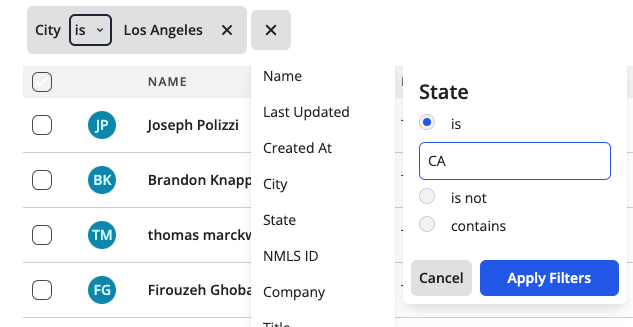
1. Click the "+" button on a contact table to access column you are able to filter. Let's select "City" and enter "Los Angeles"
Pro-Tip: If you're looking to filter contacts that do not have uniform data, use the "Contains" option to ensure you're grabbing all available contacts.
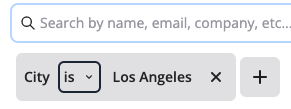
2. Click "Apply Filters" to add the filter to our table. Any contact that matches your filter will now be displayed in the table.
Now let's save this list of contacts. It's important to note that any contact we add to this Pipeline moving forward that matches this filter will also be added to our list. Saved Contacts lists are dynamic and NOT static!
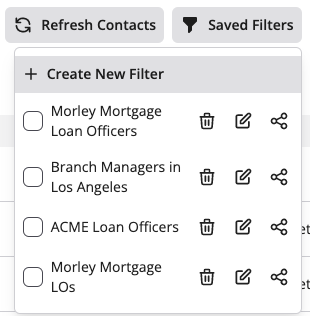
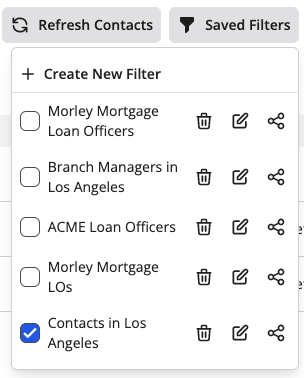
3. Click "Saved Filters" to access our existing filtered lists and save this new one.
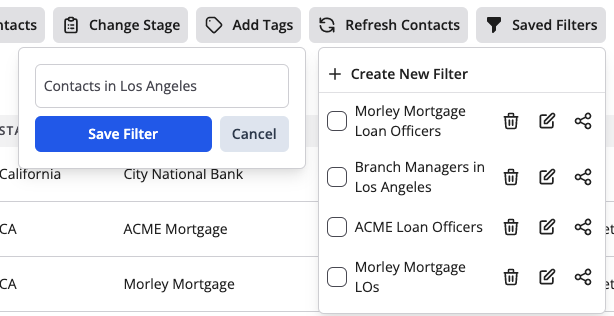
4. Click "+ Create New Filters"
5. Let's name the filter. In this case, we will name it "Contacts in Los Angeles"
6. Click "Save Filter".
Opening Existing Lists
Now that we've saved a list of contacts using Filters. We need to learn how to access those lists again in the future.
1. Click "Saved Filters" to view our existing filters.
2. Click the checkbox next to the list you want to view.
Making changes to a Saved List
We can also make changes to existing Saved Lists that we have on our account.
1. To make changes to an existing Saved Lists, let's open one and add a new filter. Let's use the "Los Angeles Contacts" we created in previous steps.

2. We can modify the existing filters by clicking on them or we can even add filters. Let's say we want to get more specific and add "State" is "CA" to this list.
3. Click "Apply Filters" to add the new filter to the contact table. Now we just need to save this view under the existing Saved List
4. Let's click "Saved Filters" to view our existing filters.
5. Your existing list should still have the checkbox checked. Click the "Edit" icon next to the name of the Saved List.
You'll see a quick loading icon appear and the list has now updated!
